
An AI Moodle course builder is easier to judge when you can see what happens between uploading a document and opening the finished course. This walkthrough follows the four steps in WebbLMS Course Builder, then shows the published demonstration in WebbLMS immersive mode.
We are using Precision Anaesthesia: Reading the Signals, a course for the fictional Aster College on our internal demonstration site. It follows a simulated case across six modules. It is not accredited clinical training.
Step 1: Set the course design
Start in Course design by uploading the material the course should use. The source document in this example contains an agreed six-module plan and twelve learning outcomes. You can generate a first course design from those sources, then edit the design before moving on.
The design records the audience, prior knowledge, reading level, delivery approach and pacing. Here, the course is fully online and asynchronous, with six modules planned at about half an hour each. Those are design targets for the demonstration, not measured completion times.
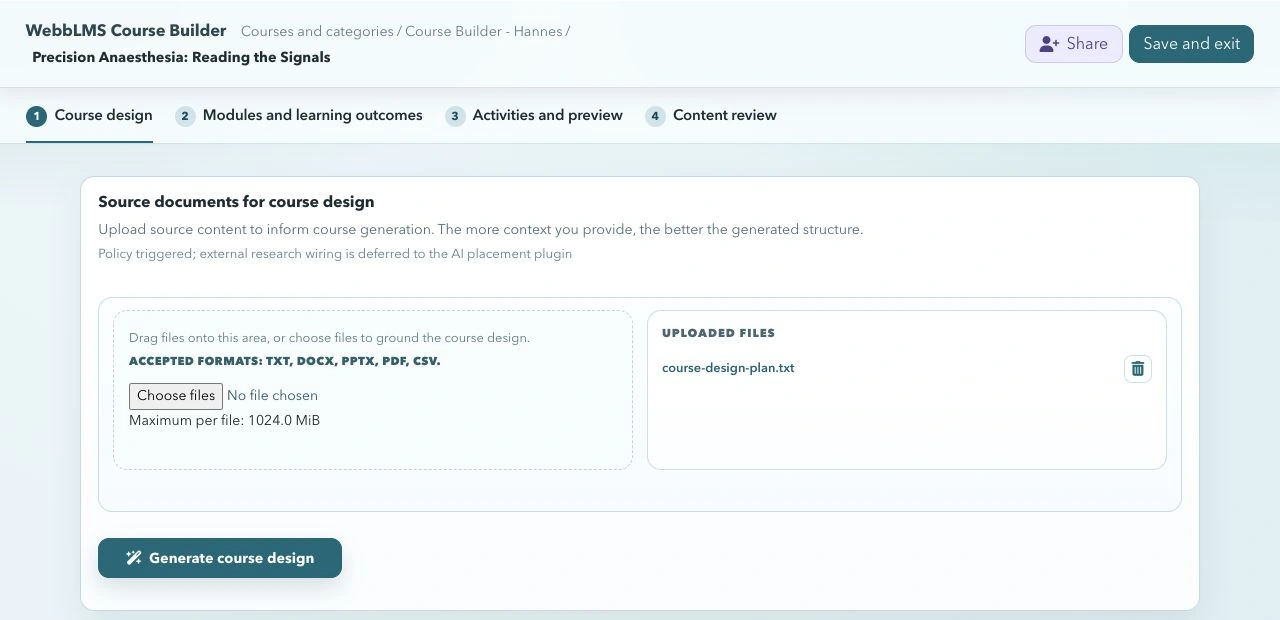
The brief also sets boundaries. Learners should distinguish an observation, an interpretation and a prediction, using the fictional case. They should identify missing evidence rather than invent facts. In a workplace course, the equivalent might be the policies learners must follow, the decisions they need to practise and the material that is out of scope.
Presets already help here: reading-level and pedagogical presets provide reusable guidance for the writing and teaching approach. Review that guidance against the actual audience. Once the design is right, choose Save and continue.
Step 2: Review modules and learning outcomes
In Modules and learning outcomes, choose the generation presets that match your source material. This demonstration uses Source-Led Modules and Explicit Source Learning Outcomes because the uploaded plan already specifies the structure and outcomes.
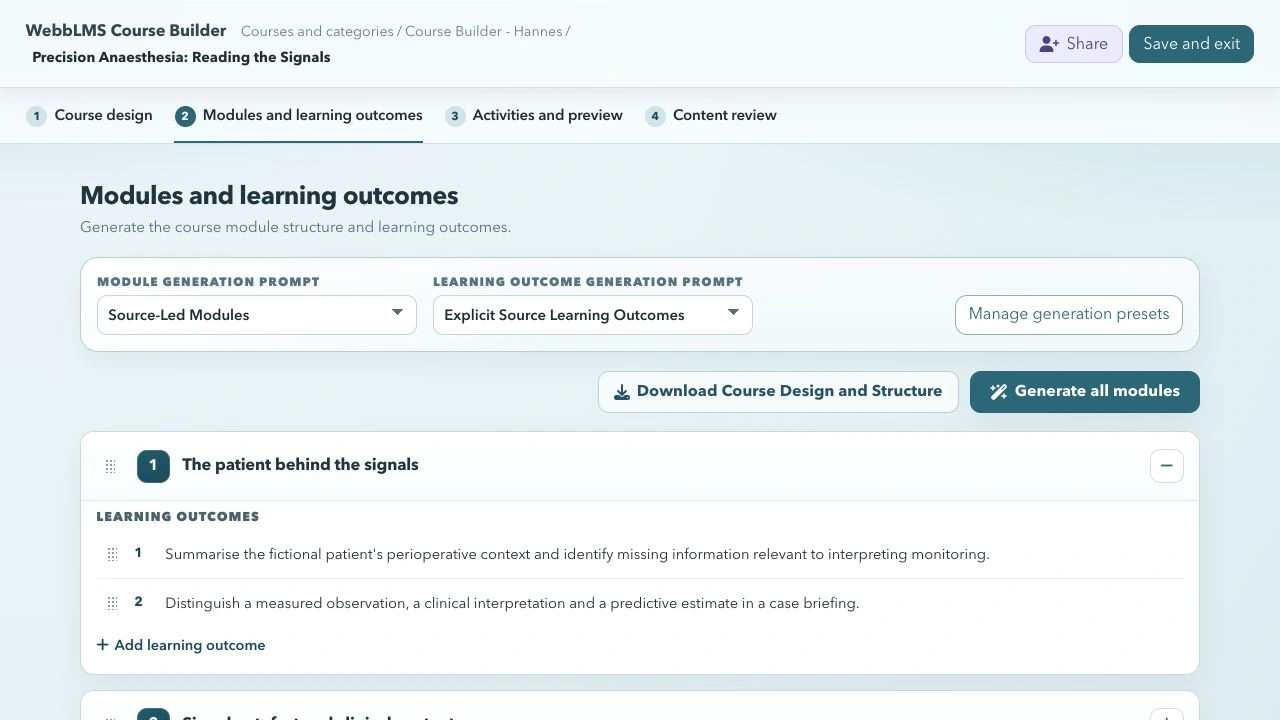
The first module, The patient behind the signals, has two outcomes: summarise the fictional patient’s context and missing information; then distinguish observation, interpretation and prediction. The later modules move through signal reliability, algorithmic alerts, conflicting information, handover and defending a judgement.
This is the point to edit wording, add or remove outcomes, and reorder modules. Check that each outcome describes something learners should be able to do and is supported by the supplied material. Correcting an outline now is simpler than repairing several finished lessons later.
Step 3: Choose the module template and generate activities
Presets turn your team’s teaching decisions into reusable configuration. They work at several levels: reading and pedagogical guidance in the course design, instructions for generating modules and outcomes, module templates that set the activity sequence, and activity presets that describe what each lesson or task should contain. You agree the approach once, then apply it across a programme instead of briefing the AI from scratch for every module.
Step 3, Activities and preview, puts that approach into practice. Add each module’s source files, choose its module type and generate the activities. From Manage module and activity type presets, you can define the activity types, their order and intended duration, including whether an activity repeats for each learning outcome.
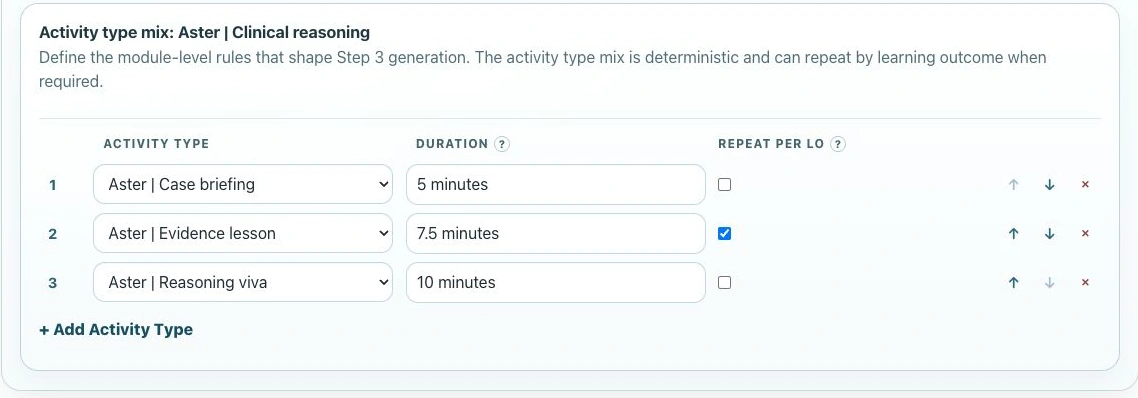
In this example, Aster | Clinical reasoning contains three template rows. The evidence lesson has Repeat per LO selected. Because the first module has two learning outcomes, the resulting module contains four activities: one case briefing, two evidence lessons and one reasoning conversation.
The benefit is consistency with room for different teaching needs. A case-based module can use one pattern; an introductory module can use another. Change the order, duration or activity mix in the template, then reuse the agreed pattern. This makes the teaching design visible and repeatable while keeping the generated content open to expert review.
Activity presets provide the instructions inside that structure. Here, the case briefing becomes a Moodle Page, each evidence lesson a Moodle Book, and the reasoning activity an AI Conversation. Their instructions define the lesson structure and the kind of questions to ask. The module template determines the sequence; the activity presets guide what each part should do.
Review the generated activity titles and briefs, adjust the sequence where needed, then select the modules to create for review. Step 3 establishes what will be built; Step 4 is where you work through the draft teaching content.
Step 4: Review the content with your experts
In Content review, open a draft activity and inspect its sections. Check the explanation against the source material, make corrections and use the review panel to leave feedback on the relevant chapter. The course author and subject expert can discuss a particular passage in context.
For this walkthrough, we added a sample suggestion to Separate facts from judgements, a short explanation of observation, interpretation and prediction. The reviewer asks for an example after each definition so learners can recognise the difference before trying the next activity.
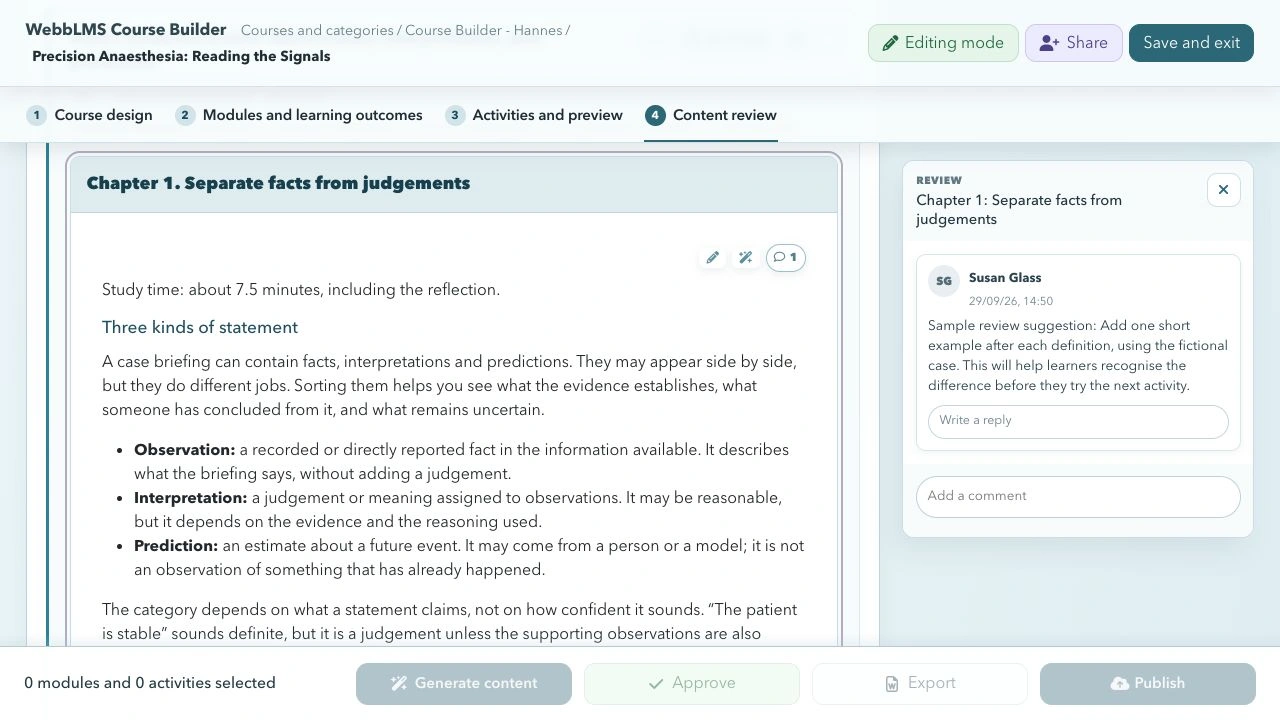
This is the kind of review that improves a lesson: it identifies a specific teaching change and explains why it would help. The author can reply, revise the section and resolve the discussion when the issue is addressed. A comment proposes a change; it does not silently rewrite the lesson.
Review factual accuracy, terminology, source alignment and whether learners have enough information to answer the questions. In a specialist subject, a fluent explanation still needs expert checking. Approve the content only when the team is satisfied with the version learners will receive.
See the finished course in immersive mode
Once the content has been reviewed and approved, publish the selected activities to Moodle. The result is an editable course made up of the activity types specified by your presets. Our demonstration’s first module contains a case briefing, two evidence lessons and a reasoning conversation.
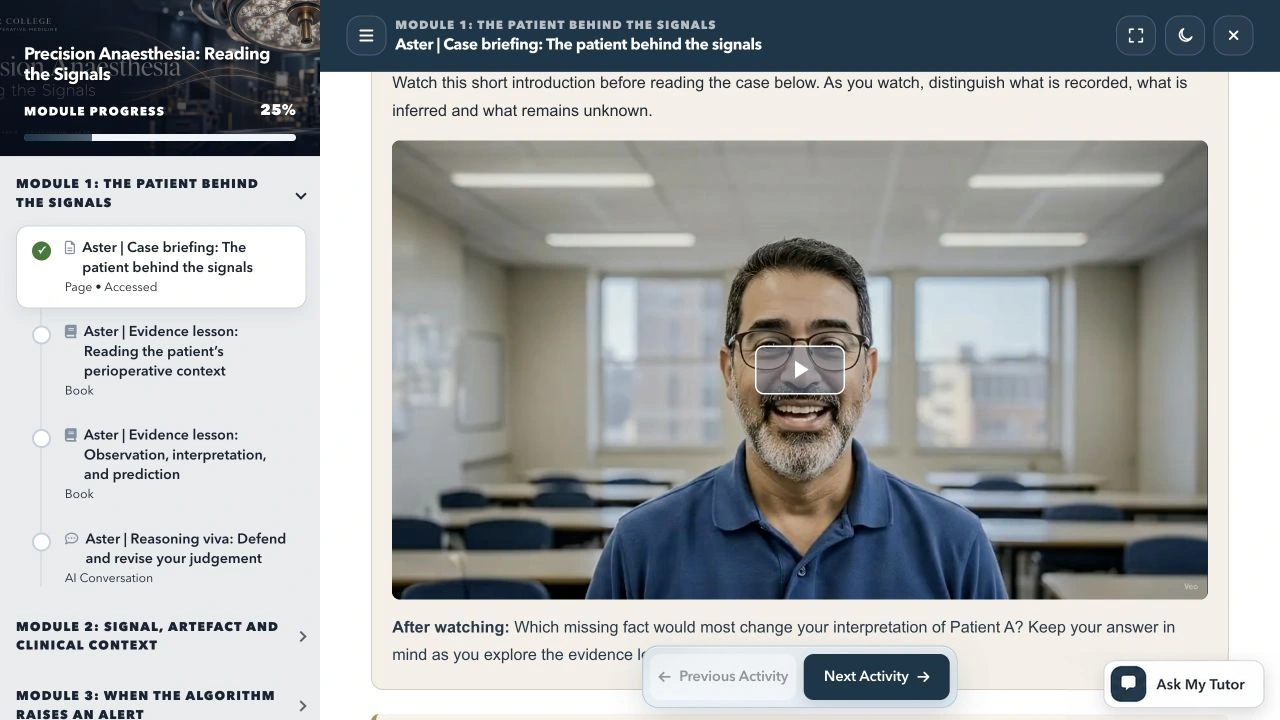
This is the course shown in WebbLMS immersive mode, which brings the lesson, course navigation and progress into one focused view. It is part of our Enhancements suite. The demonstration includes an introduction video added as supporting media.
Before releasing a real course, open it as a learner. Check the sequence, instructions, links, completion settings and access restrictions. The course remains editable, so feedback can inform the next revision.
Start with one representative module
If your organisation already has teaching material, one module is enough to test this process. It lets you judge the course design, module template, generated activities and expert review effort before applying the approach to a larger programme.
Explore the WebbLMS AI Course Builder, or talk to us about your source material. We can help define the teaching pattern, configure the presets and build a course your team can review and maintain.